
Easy Thrift Store Makeovers using IOD and DIY Paint
There’s nothing quite like a new IOD release. The Summer 2025 collection from Iron Orchid Designs showed up on my doorstep, and I opened that box like it was fresh-from-the-oven brownies—no hesitation, just joy. And then, in true form, I went to Goodwill… even though my garage already looks like a furniture foster home.
Today, I’m walking you through how I used the new IOD Ditsy Blooms Paint Inlay, St. Germaine Transfer, and some favorite IOD molds to transform trays and a memo board—one that was literally pulled from the trash.
Check out the YouTube video I created to see the entire process from beginning to end, and what these thrift store makeover projects looked like before.
1. Ditsy Blooms Paint Inlay: Bold, Beautiful, and Reusable

I started with a thrift store tray painted in DIY Paint One Step Sage, then added the IOD Ditsy Blooms Paint Inlay. It’s gorgeous—and best of all, it can be used up to three times. Inlays are just magical, and they are not a one-and-done!
Here’s how I apply it:
Brush on DIY Paint Clear Liquid Patina (be generous; you will get a much better result if you use a generous amount of Liquid Patina!)
Lay the inlay paint-side-down
Spritz the inlay with water, then use a damp paper towel or your fingers to press it evenly onto the surface.
Let it sit until almost dry. If using Liquid patina, you will have a harder time peeling off the inlay if you allow it to thoroughly dry; wet the inlay again, then gently peel it away.
That’s how you get that rich, painterly image transferred right onto your piece. I even reused the same inlay on another tray later—it still looked beautiful.
2. The St. Germaine Transfer: A Garden on Eight Pages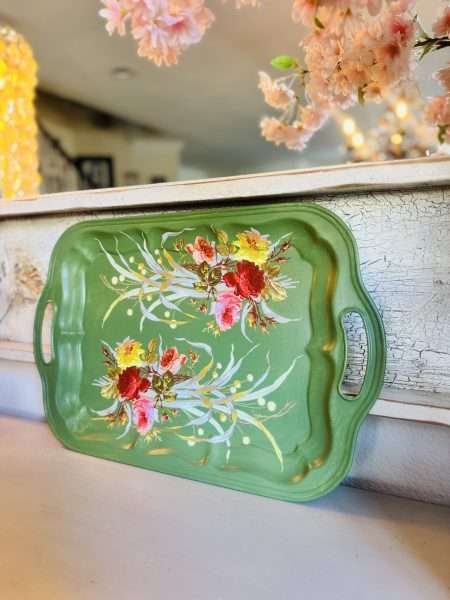
This new transfer is like a French garden party in a package. It has eight pages of soft florals, butterflies, and botanicals—perfect for summer décor. I applied it to another tray, working in sections with the enclosed burnishing stick, then sealed it with more liquid patina.
Helpful tip: Lay it down gently and don’t shift it once it touches the surface. Once the transfer contacts your surface, it will stick.
3. A Scene with Inlays: Like a Puzzle, Only Prettier
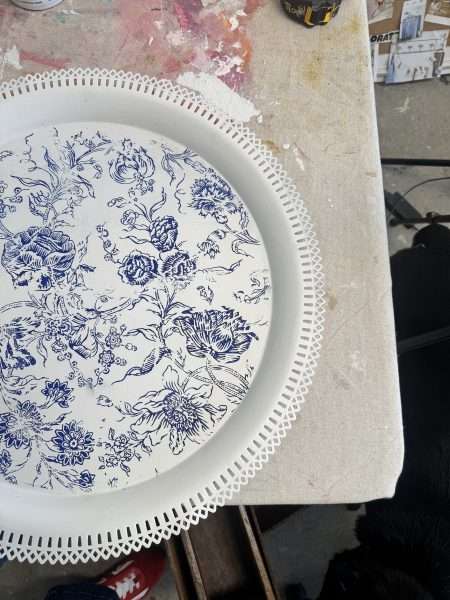
For a larger thrift store tray, I got ambitious and created a whole inlay scene using several IOD Indigo sheets taped together. It’s a bit like working a puzzle:
Trim off blank borders
Line everything up and tape it before applying
Work in sections and smooth gently
If it doesn’t go perfectly the first time, don’t worry. It will still look like something you’d pay good money for at a boutique.
4. Memo Board Makeover: From Curbside to Classic
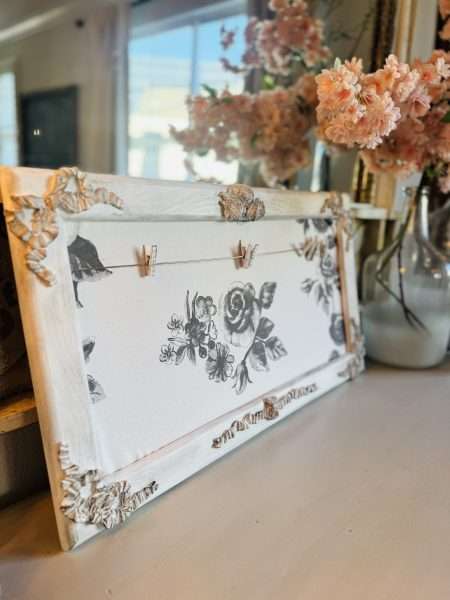
This memo board was rescued from the trash, not even the thrift store! The fabric was dated, the frame was rough, but the bones were good. I removed the backing, covered it in floral upholstery fabric from IKEA, and gave the frame one coat of DIY Paint Vintage Linen. One coat did it!
5. IOD Molds + Air Dry Clay = Instant Charm
I used the Bows and Roses molds for the final touch. If you’ve never tried IOD’s air-dry clay, here’s how to keep it fresh:
Wrap it in a wet paper towel
Cover with Saran Wrap
Seal it in a Ziploc
Dust your mold with cornstarch, press in your clay, and use a bit of Titebond glue (but not too close to the edges). Keep an eye on the drying process and press the moldings down if they start to lift.
Why I Keep Reaching for IOD and DIY Paint, and I love sharing them with you.
They just work. Everything in the IOD line mixes beautifully—from inlays to transfers to molds—and DIY Paint brings depth and vibrancy to every project. If you’re staring at something old and unloved, these products can help you turn it into something that makes you proud every time you walk past it.
If you love a good thrift store or trash-to-treasure makeover, you might love this fun tutorial too!
Ready to Try It Yourself?
You can shop the full Summer 2025 IOD release:
In person at Artisan Peacock in Brentwood, CA
Online at Redoux Interiors
And if you’re craving a live, in-person creative day, join me this fall for a Bay Area workshop with Dionne Woods of the Turquoise Iris and Debi Beard of Debi’s Design Diary and DIY Paint. It’ll be joyful, messy, and full of inspiration.
[Click here to join the waitlist]
Remember: You don’t need a brand-new piece of furniture to make something beautiful. You just need a little paint, some imagination, and permission to play.


0 Comments